Wallet Manager
Create, import, organize, and manage all your wallets in PumpKit.
Access
User Menu → Manage
Navigation
The Wallet Manager has 6 tabs:
| Tab | Purpose |
|---|---|
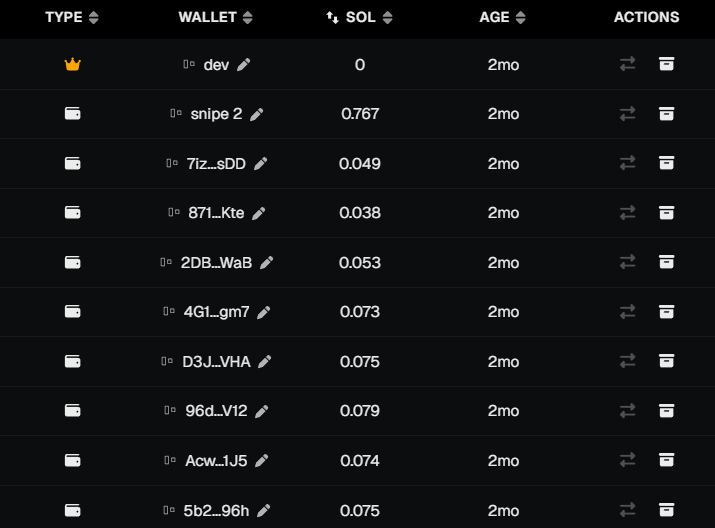
| Active | View and manage your active wallets (Dev + Trade). Create, rename, assign roles, archive. |
| Archived | View archived wallets. Restore or permanently delete. |
| Import | Paste private keys to import wallets. |
| Export | Export private keys (requires Telegram 2FA). |
| Warmup | Create and manage wallet warmup runs. See Wallet Warmup. |
| Rewards | Claim creator fees and trader cashback across all active wallets. |
Use the tab bar at the top of the modal to switch between sections.

Wallet Types
- Dev Wallet
- Required for token launches (Pump.fun / Bonk.fun).
- Can also be used for trading.
- Only 1 Dev Wallet can be active at a time.
- Trade Wallets
- Used exclusively for trading.
- Up to 99 Trade Wallets can be active at once (100 total with Dev).
Creating Wallets
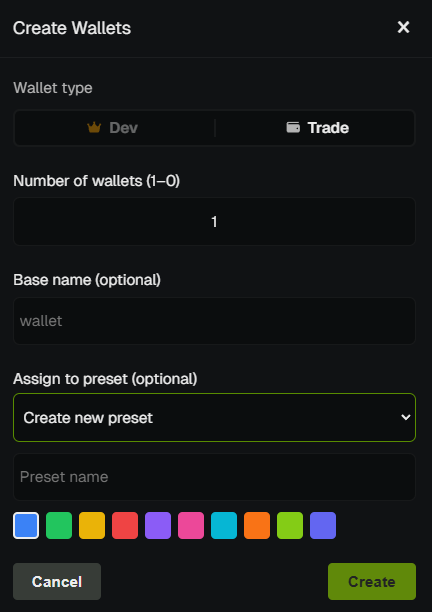
Click Create wallets (or Shift + +) to open the Create Wallets modal.
- Dev Wallet - Select Dev, optionally enter a name, then click Create. Only available if you don't already have an active dev wallet.
- Trade Wallets - Select Trade, enter the number of wallets (1–99), optionally enter a base name (e.g., "Sniper" → "Sniper 1", "Sniper 2", …). A preview shows the resulting names.
- Assign to preset (optional) - Assign the new wallets to a preset in the same step:
- None - No preset assignment (default).
- Existing preset - Add the new wallets to an existing preset. Choose from the dropdown.
- Create new preset - Create a new preset with the new wallets. Enter a preset name (required) and choose a color label. The Create button is disabled until you enter a name when this option is selected.
Preset assignment happens in a single API call during creation — no extra steps needed. New presets count toward the 10-preset limit.
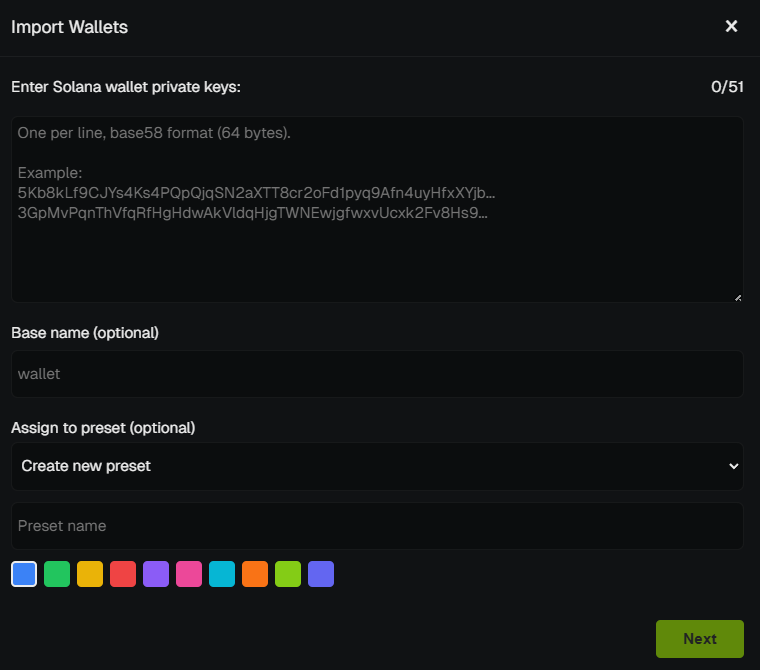
Importing Wallets
- Go to
Wallet Manager → Importand paste one or more private keys (up to 100 wallets total per account). - Optionally enter a base name (e.g., "Sniper") — imported wallets will be named "Sniper 1", "Sniper 2", etc. A preview shows the resulting names.
- Assign to preset (optional) - Assign the imported wallets to a preset in the same step:
- None - No preset assignment (default).
- Existing preset - Add the imported wallets to an existing preset. Choose from the dropdown.
- Create new preset - Create a new preset with the imported wallets. Enter a preset name (required) and choose a color label. The Import button is disabled until you enter a name when this option is selected.
- Duplicates are skipped automatically.
- If the private key already exists in Archived, the wallet will be restored to Active.
Preset assignment is available on both the form and the confirmation screen. New presets count toward the 10-preset limit.
Preset Filter
In the Active and Archived tabs, a dropdown at the top lets you filter the wallet list by preset:
- All - Show all wallets in the current tab (default).
- Preset name - Show only wallets in that preset.
Use this to focus on a subset of wallets when managing many. The filter applies to both Active and Archived tabs; Warmup and Rewards always use all active wallets. Each preset has a color label; when viewing the wallet table, the Type column icon uses the preset color for quick visual identification.
Renaming Wallets
- Inline rename - Click the ✏️ icon next to any wallet to rename it individually.
- Batch rename selected - Select multiple wallets (checkboxes), click Rename in the action bar, enter a base name (e.g., "Sniper"). Wallets are renamed to "Sniper 1", "Sniper 2", etc. A preview shows the first few names before confirming.
- Helps you keep track of wallet roles (e.g. “Sniper1”, “Main”, “Farm”).
Assign Role
- Click the ↔ (switch) icon on a wallet to reassign its role between Dev and Trade.
- Dev → Trade - Converts the dev wallet to a trade wallet. Requires available trade slots (under 99).
- Trade → Dev - Converts a trade wallet to the dev wallet. Only available if you don't already have an active dev wallet.
- Works in both Active and Archived tabs. Useful when you want to promote a trade wallet to dev or demote a dev wallet to trade without creating new wallets.
Archiving, Restoring & Deleting
- Archive wallets from the Active tab.
- Restore them later from the Archived tab.
- Delete permanently only from the Archived tab.
Exporting Wallets
You can export your private keys at any time with Telegram 2FA.
Steps:
- Go to
Manager → Export. - Select specific wallets or export all active (optionally include archived).
- Receive a Telegram 2FA code.
- Enter the code.
- Download the export file.
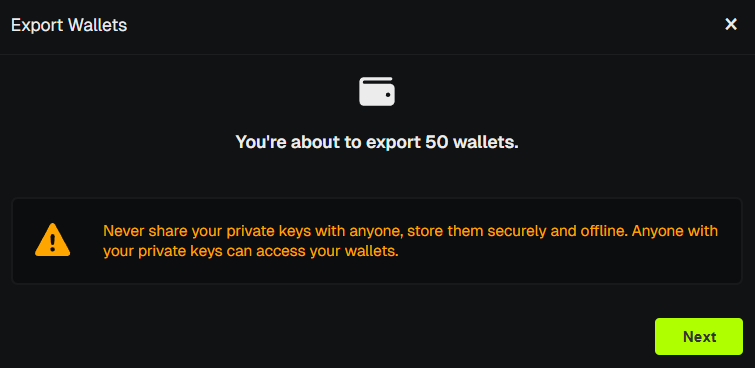
Exported file is plain text. Store it securely and never share it.
Warmup Tab
- The Warmup tab lets you create and manage wallet warmup runs.
- Warm up wallets with buy/sell cycles on tokens to avoid detection. See Wallet Warmup for details.
Rewards Tab
- The Rewards tab lets you claim trader cashback and creator fees across all active wallets in one place.
- Reward type:
- Creator fees - Fees earned from tokens you launched. Choose platform: Pump.fun or Bonk (LetsBonk).
- Trader cashback - Cashback from Pump.fun and PumpSwap trading activity.
- Preview claimable amounts per wallet, then Claim to send SOL to your wallets.
- Vault must be unlocked to preview or claim. If locked, you'll be prompted to unlock first.
💡 Notes & Tips
- Keep only the wallets you actively use in Active for better performance.
- Archive instead of deleting to keep wallets recoverable.
- Always back up your wallets before funding them with SOL.
- Use Batch rename (select wallets → Rename) to quickly organize many wallets (e.g., "Sniper 1", "Sniper 2").
- Assign role to switch a wallet between Dev and Trade without creating new ones.